[点晴永久免费OA]用Cloudflare免费做内网穿透+HTTPS永续处理
|
admin 2026年7月6日 16:17
本文热度 2252
2026年7月6日 16:17
本文热度 2252
|
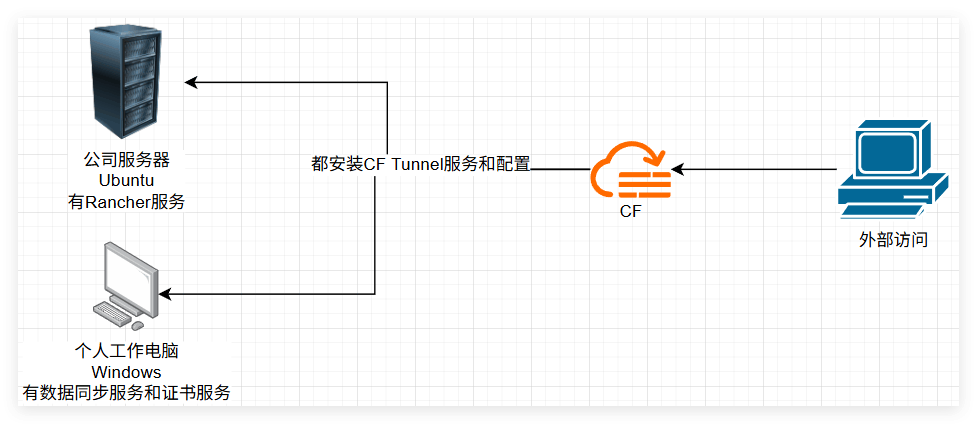
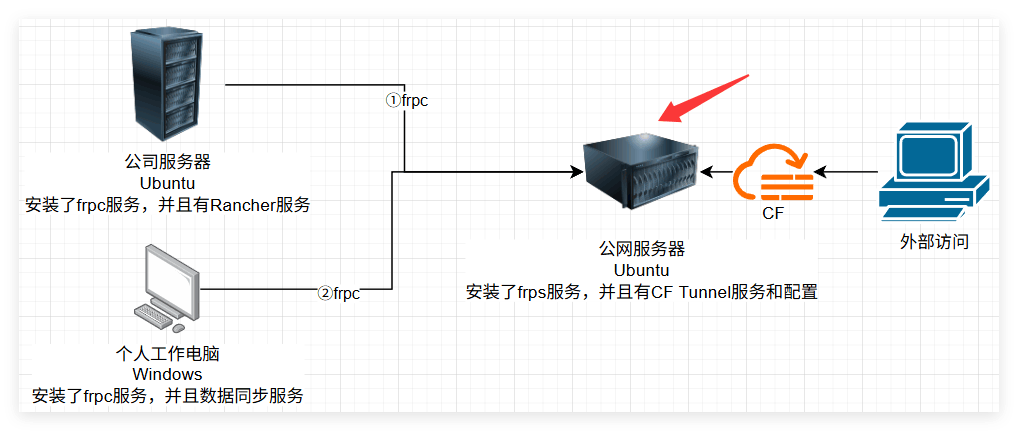 当时是通过一台公网机器部署frps+对应内网机器部署frpc的方式做内网穿透,然后再通过CF Tunnel对公网服务器做隧道代理,搞定了服务内网穿透+HTTPS处理、整套方案能很好的解决问题,当时还遗憾这套方案还不够免费(需要一台公网服务器做穿透)。然而今天和同事在搞HTTPS+Rancher配置的时候,正打算继续用这一套,他说直接在Rancher集群中安装Cloudflare tunnel即可,它本身就是做了代理穿透处理,不需要额外安装frp了。这感情好,可以省掉一台公网服务器就做到内网穿透+HTTPS服务了,如下图是最终的架构,这里简单分享一下:因为Linux上安装CF Tunnel之前文章已经写了,这里主要介绍下Windows上如何安装,感兴趣的同学也可以跟着玩一下,反正不要钱、等于现在是不需要任何成本就可以玩这一套了。
Invoke-WebRequest -Uri "https://github.com/cloudflare/cloudflared/releases/latest/download/cloudflared-windows-amd64.exe" -OutFile "cloudflared.exe"
也可以手工去GitHub下载,注意可能需要番羽Q,如果下不到可以留言,我放到网盘里面去。https://github.com/cloudflare/cloudflared/releases/latest/download/cloudflared-windows-amd64.exe
安装服务(也可以自己添加Path环境变量,这里目的是在任何目录都可以执行cloudflared.exe程序)。Move-Item -Path ".\cloudflared.exe" -Destination "C:\Windows\System32\cloudflared.exe"
cloudflared --version
cloudflared version 2026.6.1 (built 2026-06-18T06:39 UTC)
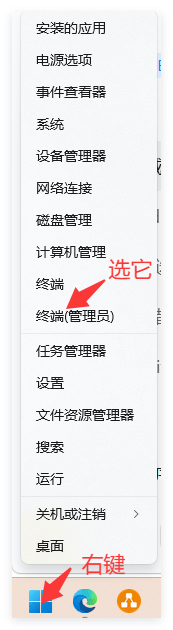
这里浏览器会自动弹出登录Cloudflare的界面,我们完成登录后选择需要操作的域名,如果没有域名就要先加上,之前讲过怎么加域名到CF中,这里就不讲了。然后添加一个新的隧道,注意复制出id值,后面有用(注意加隧道也可以到CF界面上操作),不过也得在目标服务器上安装CF tunnel服务,这里最好是跟我一样用命令加,反正在页面也可以迁移过去,方便后续维护。cloudflared tunnel create win-local
#保存下面返回的内容,尤其是id Tunnel credentials written to C:\Users\Administrator.cloudflared\xxx-xxx-xxx-xxx-xxx.json. cloudflared chose this file based on where your origin certificate was found. Keep this file secret. To revoke these credentials, delete the tunnel.
Created tunnel win-local with id xxx-xxx-xxx-xxx-xxx
然后创建配置,如果跟上篇一样已经配置过了可以直接复制过来。New-Item -ItemType Directory -Path "$env:USERPROFILE.cloudflared" -Force @' tunnel: <你的 Tunnel ID> credentials-file: C:\Users<用户名>.cloudflared.json ingress: - hostname: db-migrator.你的域名 service: http://localhost:8080 originRequest: httpHostHeader: db-migrator.你的域名
- hostname: cert.你的域名 service: http://localhost:8081 originRequest: httpHostHeader: cert.你的域名 - service: http_status:404 '@ | Set-Content -Path "$env:USERPROFILE.cloudflared\config.yml"
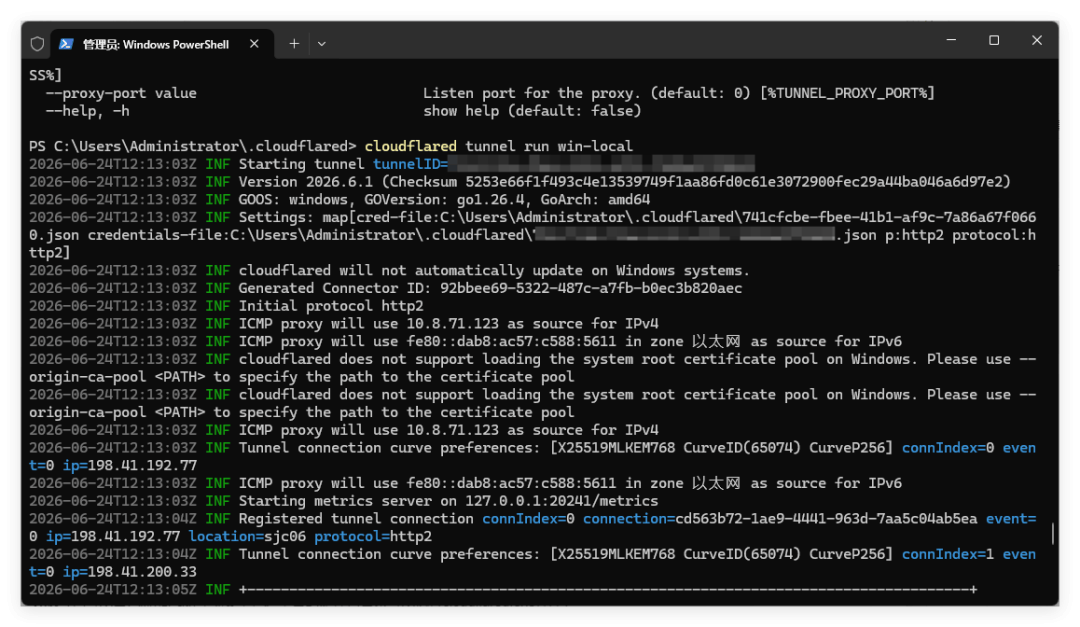
cloudflared tunnel run win-local
然后是锦上添花环节、系统自动启动,方法有很多,自己随意找个都行,目的都是电脑开机就自动启动CF tunnel服务。$action = New-ScheduledTaskAction -Execute "C:\Windows\System32\cloudflared.exe" -Argument "tunnel run win-local" -WorkingDirectory "C:\Users\Administrator\.cloudflared" $trigger = New-ScheduledTaskTrigger -AtLogOn $settings = New-ScheduledTaskSettingsSet -AllowStartIfOnBatteries -DontStopIfGoingOnBatteries Register-ScheduledTask -TaskName "CloudflaredWinLocal" -Action $action -Trigger $trigger -Settings $settings -RunLevel Highest Start-ScheduledTask -TaskName "CloudflaredWinLocal"
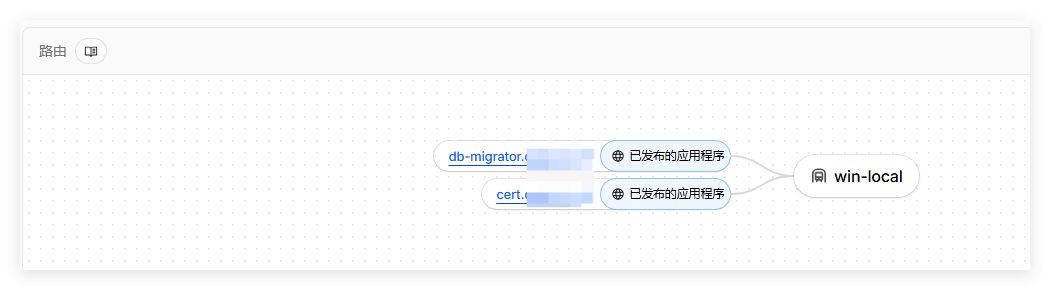
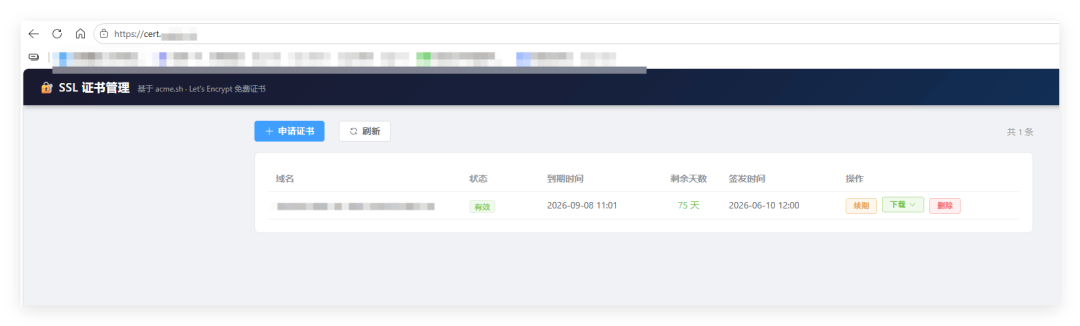
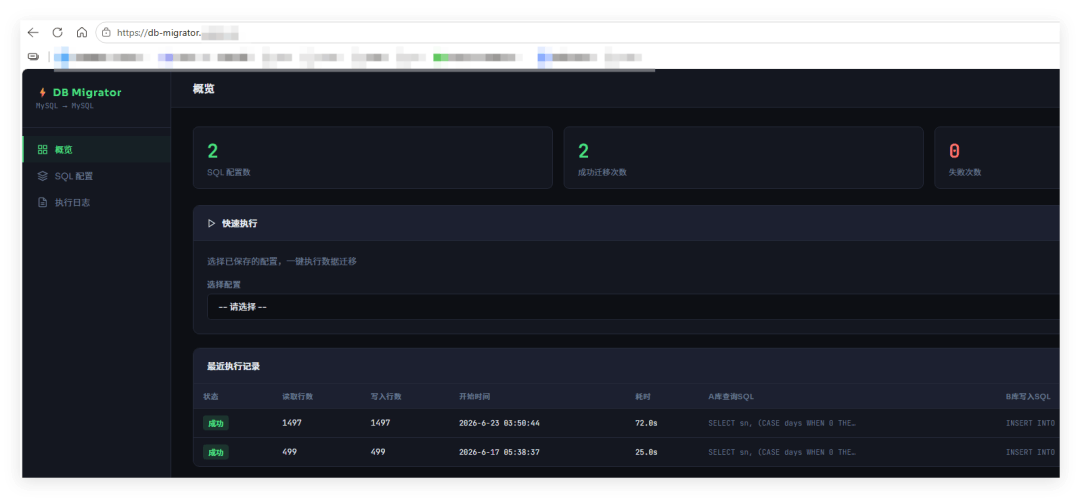
最后我们在CF域名的DNS中添加或者修改成当前配置的隧道信息,主要是让这个域名找到对应的DNS地址。比如,上面配置的两个域名要加上CNAME目标到<你的 Tunnel ID>.cfargotunnel.com即可,而这个就是链接我们配置的隧道。最终的效果展示,两个域名都是HTTPS访问,穿透到具体的机器服务上,我直接用手机(断开WIFI)一样的可以访问到内网的服务数据。和MySQL数据拷贝的服务,这些都是本机开发的,其他服务器的配置都类似,因为前面已经做过Linux的配置,这里就不展示了。有网友说:这是为了一碟醋来包一大盘饺子,其实不能这么想,技多不压身,更何况很多人维护系统、苦于HTTPS免费安全证书3个月一更久矣,这岂是一小碟醋的价值?
阅读原文:https://mp.weixin.qq.com/s/sv-i-eecOW8TgEl-Qu8ryA
该文章在 2026/7/6 16:17:33 编辑过






 400 186 1886